

Availability: All plans
An easement described from a centerline does not close, and that single fact changes how you plot it. This guide runs a strip, corridor or variable width easement end to end in BoundaryLogic Trace: reading the width out of the description, declaring it in the editor, watching the corridor generate around the line, and checking it course by course. At the end you will have a plotted corridor with its area, its length and its widths, and you will know which descriptions Trace cannot plot at all.
Manual plotting is on every plan and burns no credits, so none of this needs a paid tier.
What you will need
- A project in Trace, with edit access on it.
- An easement description in front of you: utility, pipeline or access.
- The centerline as bearings and distances, with the width stated against those courses or against a described point.
1. Read the width before you type anything
The width language is the decision that shapes the whole plot, so settle it first. Four shapes cover nearly everything that arrives.
- One width, centered on the line. The symmetric case, and the one the editor handles with a single figure.
- A width for each side. Asymmetric, where the record gives a different figure left and right.
- All of it on one side. The record puts the whole strip on the southerly or the westerly side of the line. One side takes the full width, the other takes zero.
- A width that changes partway along. Variable width, which needs a width table.
Two things about sides. Left and right read against the direction of travel, meaning the order your calls run, so reversing the call order swaps them. And a cardinal side resolves per course: the southerly side of a centerline running east is the right side, and the same cardinal side on a centerline running west is the left.
What Trace does not plot
Settle this before you start typing. Trace plots a width stated geometrically, against a course or a described point. Two forms are not handled.
- Widths referenced to stations. A width table addressed to the stationing, reading from station 12+00 to station 18+50, is not addressed to the courses, and Trace does not plot it directly.
- Spiral curves. A transition spiral between a tangent and a circular curve is not part of what Trace plots.
Stationing in a source description is a signal, not an opportunity. Set that document aside rather than approximating it.
2. Declare the easement
The declaration comes first, because Trace needs a width before it can offset anything. Use New easement on the editor toolbar rather than typing the header yourself: it writes the block in the order Trace expects and will not insert an incomplete one. Three of its fields are decisions rather than transcription.
- Set the width. Strip width splits one figure evenly about the centerline, so 60 plots 30 feet each side. Each side takes a left and a right figure and accepts zero on one side, which is how a one sided corridor is declared.
- Choose whether the centerline starts at a point of beginning or a point of commencement. A commencement ties through to the point of beginning on calls prefixed with a slash, so pick the one the record actually uses.
- Optional: add a width table row for every range that carries something other than the declared width.
Easements and centerlines carries the form field by field, including the naming, the anchor and the preview.
Width rows address calls, not stations
A width row names a range of call numbers, inclusive, and gives the width those calls carry. Calls no row covers keep the declared width. Each row picks its own transition: Step holds the width across the range and jogs at each end, and Taper changes it smoothly from a start width to an end width.
Here is where a variable width description stops being transcription and becomes reading. You decide where the calls end, so end a call at every width change, even where the bearing does not change, because the width table has no other way to address that point on the line. Two collinear calls in a row are not a mistake in a corridor. They are how the width table gets somewhere to attach.
3. Type the centerline calls
The form writes only the header, and the courses follow it. Type them in the order the description runs them, and the corridor draws as they appear: the centerline in a dash dot pattern, with the outline of the corridor it generates around it. A curve call carries through the offsets, so a bend in the centerline bends both edges with it.
Three editor messages here are worth reading rather than clicking past.
- Inside offset exceeds curve radius on a call means the corridor is wide enough to reach the centre of a curve on its own centerline, so the geometry has no inside edge left. Check the radius and the width against the record.
- Overlapping width specifications at calls 2 to 2 means two rows cover the same call. The later row wins, which is usually what you meant, so read it and confirm.
- Width not specified for calls 2 to 3 means a variable width easement has a run of calls no row covers. It draws nothing there until you cover it.
4. Read the corridor on the plot sheet
The tract card reports the easement area in place of the closure figures and states Open centerline traverse. No closure figures. That is correct rather than missing. Closure error, precision and the remainder to the point of beginning are properties of a closed traverse, and a centerline runs from one end to the other and never comes back.
Turn on the Easement label button above the plot to dimension the corridor. The half widths print as left over right text at the corridor ends and at every width change, such as 15/15 ft and 30/30 ft. That button is off by default, which is easy to miss when the widths are the thing you came to check.
5. Check the corridor report
The editor’s readout is the live figure. The corridor report works the arithmetic out again, and you reach it from the layer’s card rather than from the editor: there is no report entry point inside the manual plotting workspace.
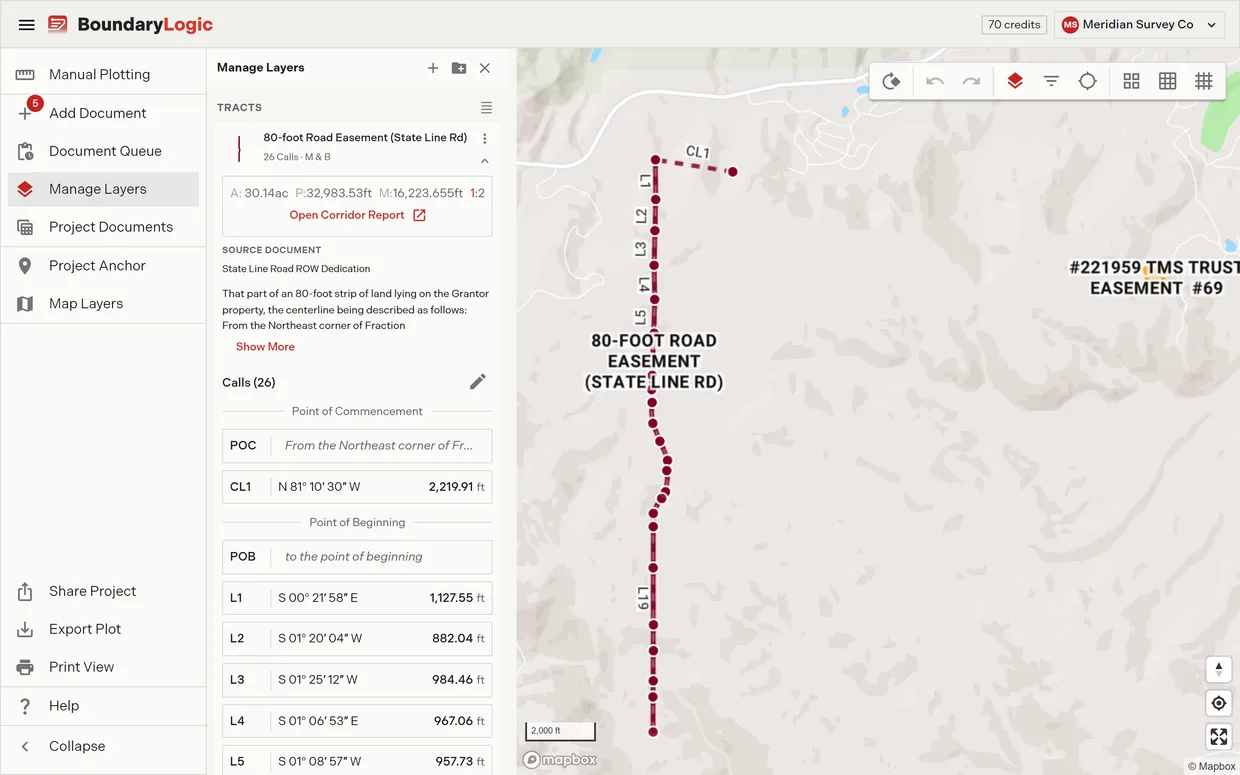
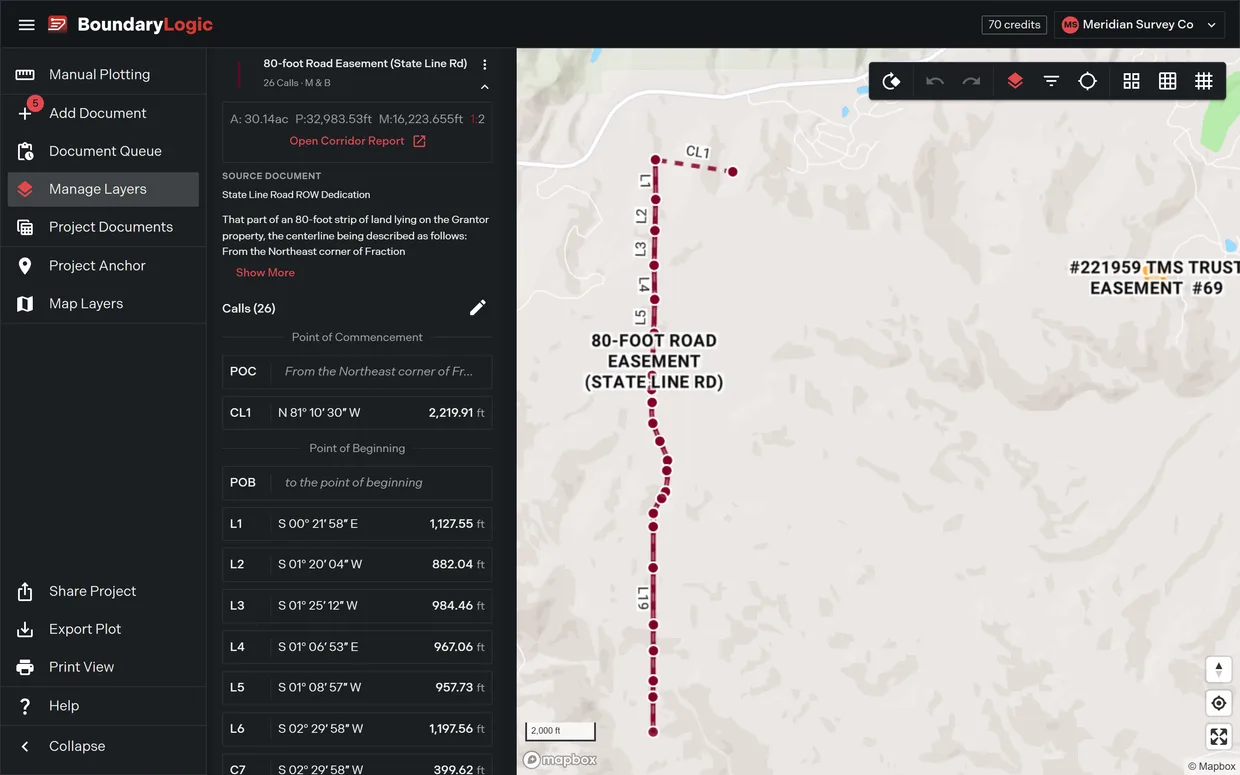
- In the project menu, click Manage Layers.
- Click the easement’s card to expand it. Because the layer is plotted as a centerline, its report button reads Open Corridor Report rather than Open Closure Report.
- Click Open Corridor Report.
Four cards, then the table. Area gives acres over square feet. Centerline Length gives feet over meters. Stations counts the courses that make up the centerline. Width gives a single figure with its left and right split where the corridor is uniform, and Varies by station where it is not.
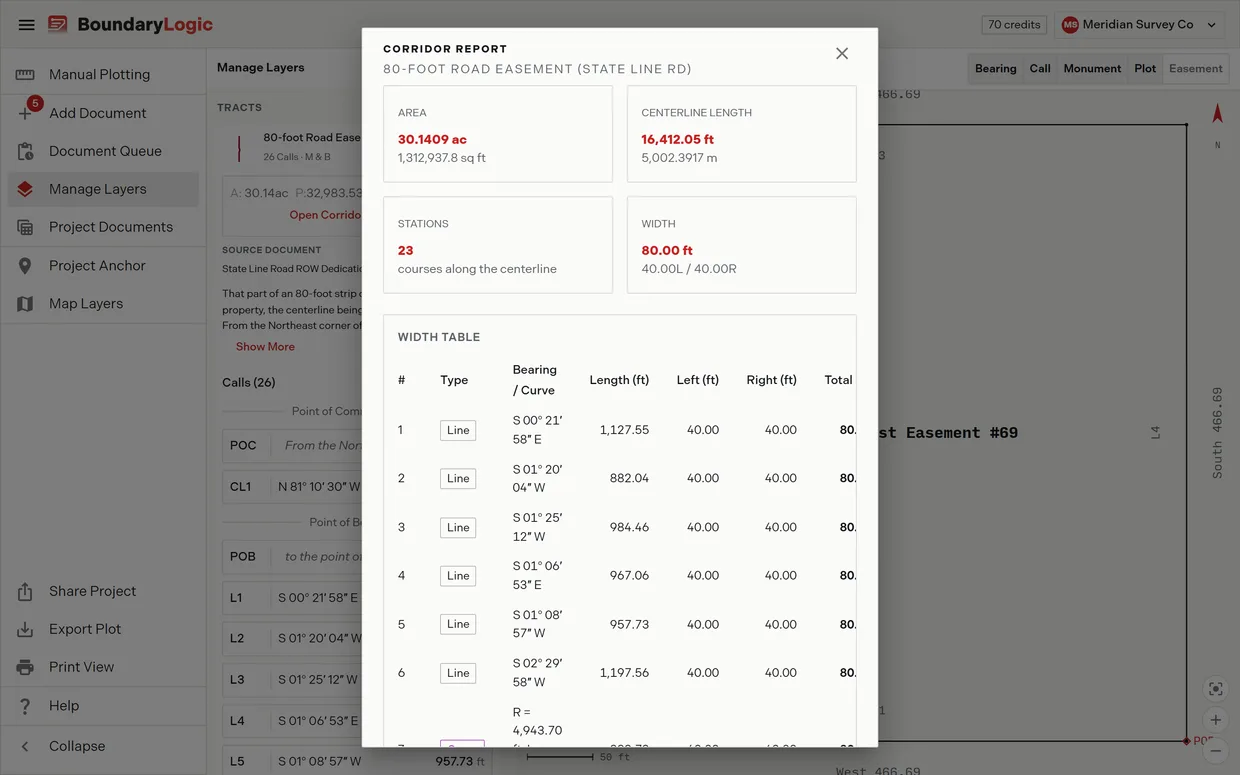
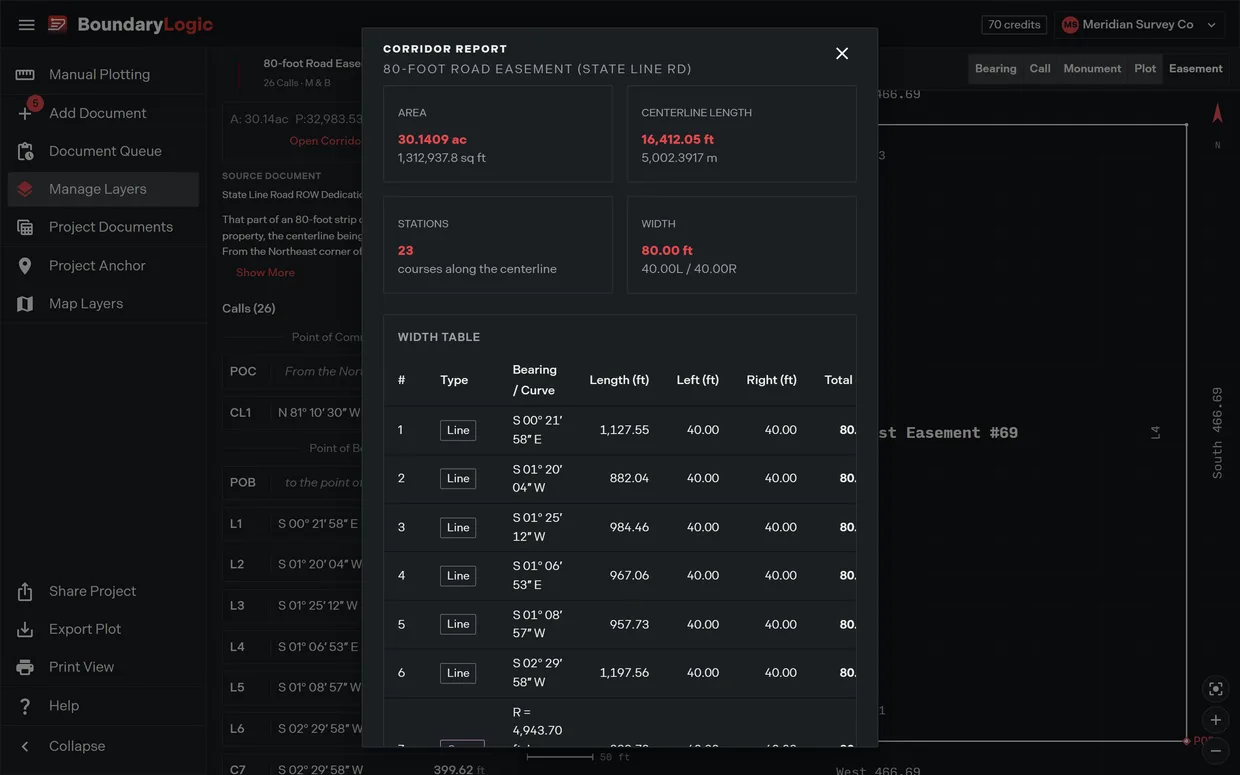
The Width Table is the course by course check: type, bearing or curve, length, and the left, right and total offsets, totalled at the foot. A course with no width set is shaded and italic, which is how a gap in a width table shows itself.
A worked corridor
An 80 foot road easement running just over 3 miles reports like this.
| Card | Value |
|---|---|
| Area | 30.1409 ac |
| Centerline Length | 16,412.05 ft over 5,002.3917 m |
| Stations | 23 courses along the centerline |
| Width | 80.00 ft, split 40.00L / 40.00R |
Read the Width card first. A single figure means the width held the whole way, which is why this easement reads 80.00 ft rather than Varies by station. Where the width does change, the card reports a range instead and the table shows the new offsets on the course where they change.
One note on figures. Trace works the corridor area out twice and the two disagree slightly, by roughly 23 square feet in 1.3 million on that easement. Since the checks are shown for the professional who verifies them, quote the one you are reading rather than mixing the two.
Where to go next
- Easements and centerlines, the canonical procedure for declaring one, field by field
- Deed syntax reference, every centerline declaration and every width table form the editor accepts
- The corridor report, the report card by card
- Curves and calls, for a curve on a centerline
- The manual plotting workspace, for the editor itself
- Manage Layers, for the card the report opens from
- Sheet View, for the Easement widths toggle on the drawing
- Export formats, for getting the corridor out